Raspberry Pi Advent Calendar 2015の2日目です。今回はWindowsを使ってRGBの3色が点灯するLEDを扱ってみます。
Advent Calendar経由で来られた方の中には、Raspberry Pi でWindows?という方もおられるかもしれません。(1)の記事でWindows 10 IoTを動かす方法を紹介しています*1。
今回はIoTのサンプルにあるRGB LEDを試してみました。
まずは動かした結果をご覧ください。3色に応じたスイッチを用意し、スイッチの操作に応じて色が変わっていく様子です。
IoTその2 pic.twitter.com/XzRkIdBdxd
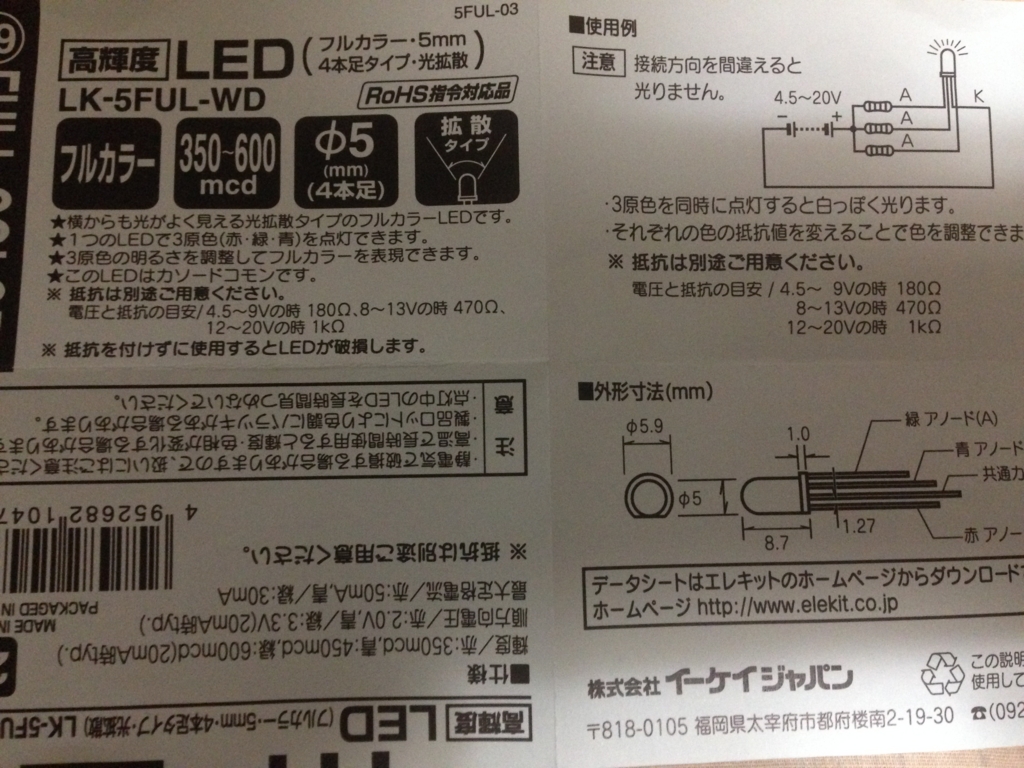
— たなか@祝セリーグ制覇 (@tanaka_733) September 24, 2015今回使ったのはRGB LEDですが、サイトに紹介されているのと同じ型番のものではなく店頭にあったものを使っています。スペックはこんな感じ。

そのため抵抗もスペックに合わせたものを使っています。
さて、UWP(Universal Windows Platform)アプリでLEDを点灯させるアプリを作っていきます。まずアプリの見た目をXAMLで定義します。今回はシンプルにCheckBox3つでRGBそれぞれのSWとします*2。
<Grid Background="{ThemeResource ApplicationPageBackgroundThemeBrush}">
    <StackPanel HorizontalAlignment="Center" VerticalAlignment="Center">
        <CheckBox IsChecked="{x:Bind ViewModel.IsBlueOn, Mode=TwoWay}" Content="Blue On/Off" HorizontalAlignment="Center" FontSize="26.667" />
        <CheckBox IsChecked="{x:Bind ViewModel.IsRedOn, Mode=TwoWay}" Content="Red On/Off" HorizontalAlignment="Center" FontSize="26.667" />
        <CheckBox IsChecked="{x:Bind ViewModel.IsGreenOn, Mode=TwoWay}" Content="Green On/Off" HorizontalAlignment="Center" FontSize="26.667" />
    </StackPanel>
</Grid>
そのViewにBindingさせるViewModelクラスです。指定したピンNo に対してLEDのOn/Offを制御する GpioPinDriver クラスを作って、CheckBoxのCheckedプロパティの変更を受けて操作しています。
using System;
using System.Collections.Generic;
using System.ComponentModel;
using System.Linq;
using System.Runtime.CompilerServices;
using System.Text;
using System.Threading.Tasks;
using Windows.Devices.Gpio;
using RGBLedBlinky.Annotations;

namespace RGBLedBlinky
{
    public class MainPageViewModel : INotifyPropertyChanged
    {
        private const int BlueLedPin = 5;
        private const int RedLedPin = 6;
        private const int GreenLedPin = 13;
        private GpioPinDriver blueDriver;
        private GpioPinDriver redDriver;
        private GpioPinDriver greenDriver;
        private bool? isBlueOn;
        private bool? isRedOn;
        private bool? isGreenOn;
        public event PropertyChangedEventHandler PropertyChanged;

        [NotifyPropertyChangedInvocator]
        protected virtual void OnPropertyChanged([CallerMemberName] string propertyName = null)
        {
            PropertyChanged?.Invoke(this, new PropertyChangedEventArgs(propertyName));
        }

        public MainPageViewModel()
        {
            var gpio = GpioController.GetDefault();

            // Show an error if there is no GPIO controller
            if (gpio == null)
            {
                return;
            }
            blueDriver = GpioPinDriver.Init(gpio, BlueLedPin);
            redDriver = GpioPinDriver.Init(gpio, RedLedPin);
            greenDriver = GpioPinDriver.Init(gpio, GreenLedPin);
        }

        public bool? IsBlueOn
        {
            get { return isBlueOn; }
            set
            {
                if (value == isBlueOn) return;
                isBlueOn = value;
                OnPropertyChanged();
                SwitchLed(blueDriver, isBlueOn);
            }
        }

        public bool? IsRedOn
        {
            get { return isRedOn; }
            set
            {
                if (value == isRedOn) return;
                isRedOn = value;
                OnPropertyChanged();
                SwitchLed(redDriver, isRedOn);
            }
        }

        public bool? IsGreenOn
        {
            get { return isGreenOn; }
            set
            {
                if (value == isGreenOn) return;
                isGreenOn = value;
                OnPropertyChanged();
                SwitchLed(greenDriver, isGreenOn);
            }
        }

        private void SwitchLed(GpioPinDriver driver, bool? isTurnOn)
        {
            if (isTurnOn == true)
            {
                driver.TurnOn();
            }
            else
            {
                driver.TurnOff();
            }
        }
    }

    public class GpioPinDriver
    {
        private GpioPin pin;
        private GpioPinValue pinValue;
        public static GpioPinDriver Init(GpioController gpio, int pinNumber)
        {
            var pin = gpio.OpenPin(pinNumber);
            pin.SetDriveMode(GpioPinDriveMode.Output);
            return new GpioPinDriver(pin);
        }

        private GpioPinDriver(GpioPin pin, GpioPinValue initValue = GpioPinValue.Low)
        {
            this.pin = pin;
            pinValue = initValue;
            pin.Write(pinValue);
            pin.SetDriveMode(GpioPinDriveMode.Output);
        }

        public void TurnOn()
        {
            if (pinValue == GpioPinValue.Low)
            {
                pinValue = GpioPinValue.High;
                pin.Write(pinValue);
            }
        }

        public void TurnOff()
        {
            if (pinValue == GpioPinValue.High)
            {
                pinValue = GpioPinValue.Low;
                pin.Write(pinValue);
            }
        }
    }
}
と、これだけのコードでRGB LEDの操作ができました。